Tying with Biots
Curtis Fry - May, 2014

Out of all the possible materials for fly bodies -- especially midges and mayflies -- I'd say biots are probably one of the more under-utilized yet cool-to-tie-with materials out there.
Let me nerd out (as Cheech puts it) for a few sentences.


In the world of fly tying, you'll typically see goose biots sold already separated from the quill, while turkey biots are sold with the whole feather intact. Just be mindful that you're mostly focusing on those shorter fibers (as shown at in the photo here on the left side of the quill).
Some will suggest you separate the biot side of the quill on a turkey feather with an Exacto knife or razor blade, but I personally prefer to leave them together. Either way is fine and won't affect how you tie.
The next consideration is really how to decide between a goose or a turkey biot. In general (I say "general" because this all depends on the bird and the quality or type of feathers you're using), goose biots are stiffer and shorter. Therefore, they make good tails or appendages for Copper John's, Prince Nymphs and other patterns. When it comes to bodies, because of the limited length, goose is not much good for bodies on patterns bigger than a #16 or #14 usually. Because of this, I usually stick to turkey biots for wrapping bodies and goose biots for tails and such. And the cool thing is that they come in all sorts of colors to imitate anything from midges, to baetis, to PMD's, to caddis, spinners and a lot more.
Just comparing a couple of average sized fibers from both a turkey and a goose, you can see that the turkey is significantly longer, but of course that can vary from bird to bird and feather to feather. And just to show that they both provide similar results, I wrapped a body with each biot type. There's really not an appreciable difference, but I tend to like the more pronounced "ridge" provided on the turkey biot. But again, that will vary from bird to bird, so not a huge difference in the long term. So that being equal, the fact I can tie bigger fly bodies with turkey means I usually grab the turkey biots when doing bodies.
Going a step further with turkey, if you're like me, you might wonder if it's even possible or advisable to tie with the non-biot side ("lift") fibers on the feathers. You'd be surprised to learn that, yes indeed, it's very possible to use those side of the feathers. Those feathers aren't near as durable and don't provide as nice a segmentation, but they're great on really small flies (smaller than a #20 for instance) because their tips are so tapered. You can see the difference between the two feathers here on the left. The top one is pretty wussy, but surprisingly can provide decent results. Anyway, not the best way to go, but here's a comparison. As you can see, the "lift" fiber did not provide a super-clean-cut segmentation line and the feather ridges were a bit weak. Probably not a deal killer, but I'll stick to the biots.
So now whether or not you choose turkey or goose, there are yet additional considerations to deal with: How to tie in and wrap the biot so that you get those well-defined ridges or a smooth body.
Well, truth be told, there are a lot of different ways people will advise you as how to tie in the biot so as to ensure the smooth vs the ridged and segmented body. Google it if you're interested. But before we go there, you're best off understanding the structure of these fibers. Then you can figure out the way that best works for you because you'll understand what part of the feather you'll want pointing where. Got it? Good.
First thing is to hold the biot up to a light source and you can see three very distinct features. First, because you know better than to cut a biot from the stem with scissors (cardinal sin #1 with biots is to cut the fibers from the quill), you'll see a fairly distinct notch. This notch will correspond to the side of the fiber that I call the "webby side". As you can see here, the webby side doesn't have any ridges to provide for that tell-tale segmentation. Whereas the "ridge" side will be the stiffer side with the very fine line of feather fibers that create the segmentation you're after. Taking the light away, the webby side isn't as visible, but you can always find it if you have the notch identified. Worst case, if the biot is cut and you can't tell which side is which, just guess or throw it away and rip off a new one. But here's another view without the aid of a light.
So there are a couple of ways to get the needed effect. To get the ridged segmentation, you want the webby side (i.e. the notch) facing the eye of the hook as you wrap forward. For me, this means I tie in the biot notch down (see the photo to the right) because I will pull the fiber up, twisting it away from me (as shown by the arrow in the first photo there). Then, as you see in the 2nd photo, as I begin to wrap the biot, the notch faces forward towards the eye of the hook. This will create the segmented look. Take a few trial and error wraps to get the hang of it. And regardless of how you tie in or twist the biot, the main thing to remember is: When wrapping, the notch or webby side facing forward gives the segmentation, the notch or webby side facing backward is the smooth effect.
Like it says above, if you want a smooth body, the webby side needs to be facing towards the bend of the hook as you wrap it, which is basically the opposite of what's shown in the photos here. This will ensure the ridge side is covered up and smoothed out with each successive wrap.
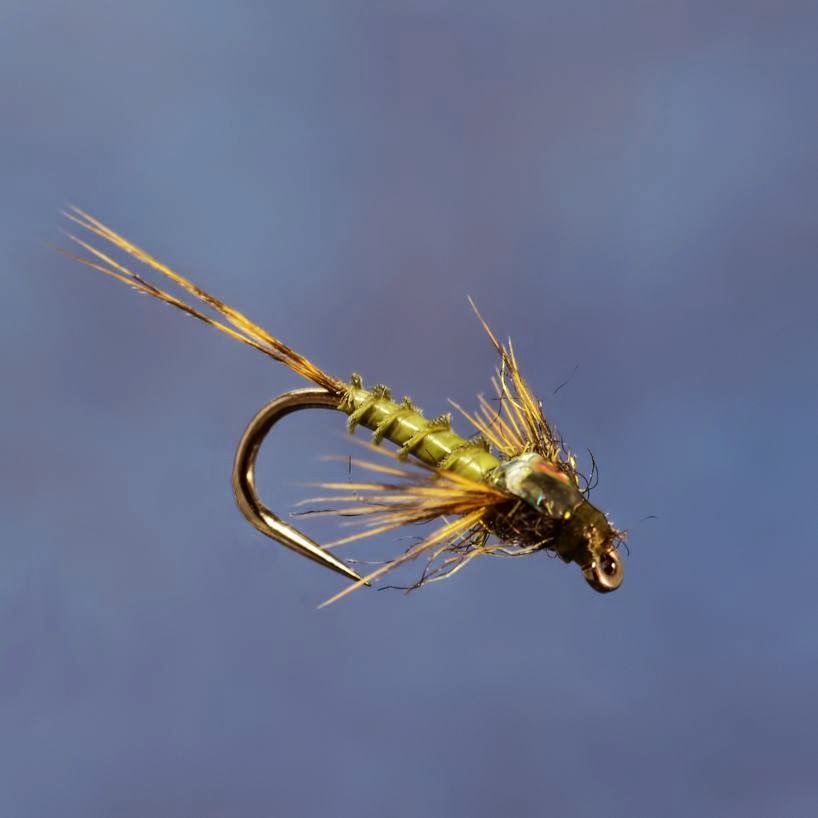
Now, let me bloviate a bit regarding the "smooth" effect. I've churned out some decent looking smooth biot body flies over my years, but if I'm looking for a smooth segmented body, biots aren't my first choice. I'll go with thread and ribbing, peacock or even stripped quills before I use biots. First off, turkey biots don't do well at all for smooth bodies. They don't have as good segmentation color contrast, the webby portion of the fiber varies a lot in size and they are just a little too squirrelly to tie with for that purpose. That leaves us goose. The midge pattern shown below is from an olive dyed goose biot tied with the notch facing backwards (or tied in facing up). It looks ok, but I much prefer peacock or other methods to get the smooth effect. Now that's just me and I'm sure there are a lot of tyers out there that will prefer them because they're easy to come by and look pretty good. Anyway, just my 2 cents there.
Wow, now reading through this post, that's a lot of information. Plus, I'm to the point where saying the word "biot" is strangely foreign and somewhat meaningless I've said it so many times here. Either way, I hope that helps in your tying. And again, we keep some great turkey biot colors in stock, so get some here.
